
The following is a transcription from Andrew’s TestFlix talk on “How to Jumpstart Python Testing in 5 minutes?”
About Andrew:
Andrew Knight, also known as “Pandy,” is the Automation Panda. He’s a software testing and automation champion who loves to help people build better-quality software. In the past, he’s built large-scale test automation projects that run continuously and reliably. Currently, Pandy is a Developer Advocate at Applitools, where he helps folks do the best visual testing they can. He is also the Director of Test Automation University, which offers a multitude of free courses on software testing from the world’s leading instructors. On the side, Pandy is writing a book on software testing, and he also leads development for Boa Constrictor, the .NET Screenplay Pattern.
Check out his tech blog at AutomationPanda.com, and follow him on Twitter at @AutomationPanda.
Huge shoutout to BrowserStack, our Exclusive sponsor for all community events and Premier sponsor for Conferences. We thank them for supporting us.
Let’s Dive in!
Why Python?
So, Python is hot right now and everyone loves it, but why do people love python so much? Well, some people just love the simple readable syntax of the language, while others are really in love with the community of people who use python.
Python is a great language for test automation because it’s super easy to get started. So, today Andrew is going to tell us how to jump-start Python testing in 5 minutes flat.
Test Framework – pytest
To start testing, we must first pick a test framework. Test frameworks enable you to write individual test cases in code, execute them together, and report, pass, or fail results.
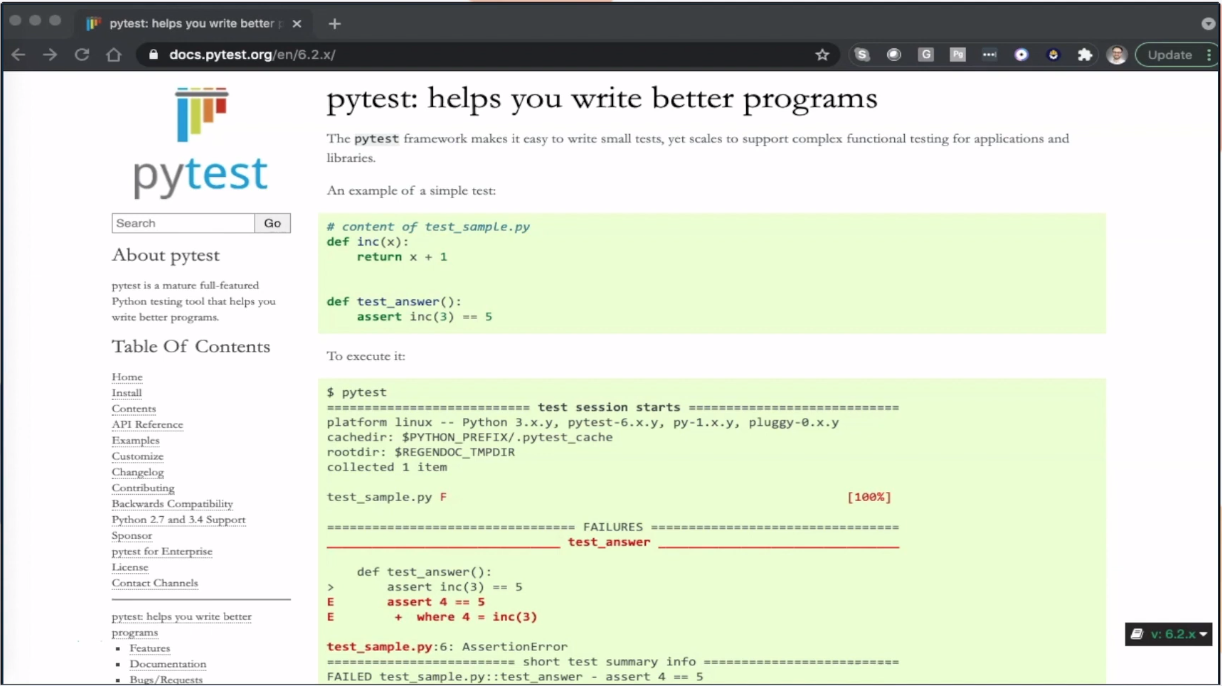
Here, we will use “pytest”, python’s most popular test framework. “Pytest” is loved because of its structure. It is simple and concise.
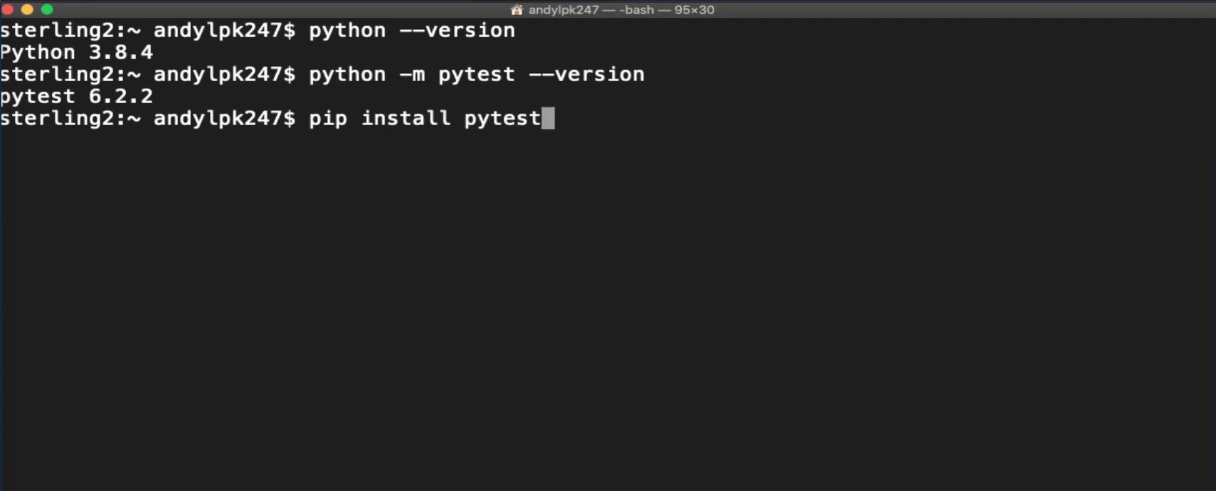
For this demonstration, we’ll be using Python3.8.4 and pytest 6.2.2. “pytest” is a third-party package. So, if you don’t already have it, you’ll need to install it with “pip install pytest”.
The next thing to decide is, where to put your test code. Typically, you want to put your test code in the same project or repository as the python code. That way everything can be found in one place and all code can be version controlled together. However, sometimes automated tests should be put in their own repository, like when there are end-to-end tests that cover multiple projects or entities.
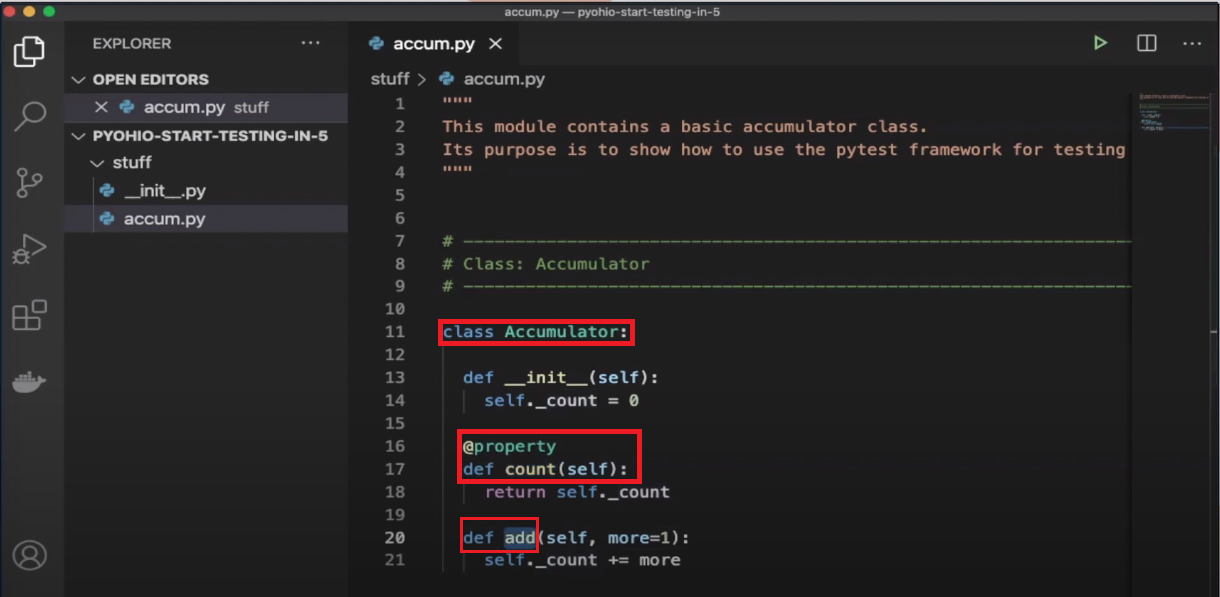
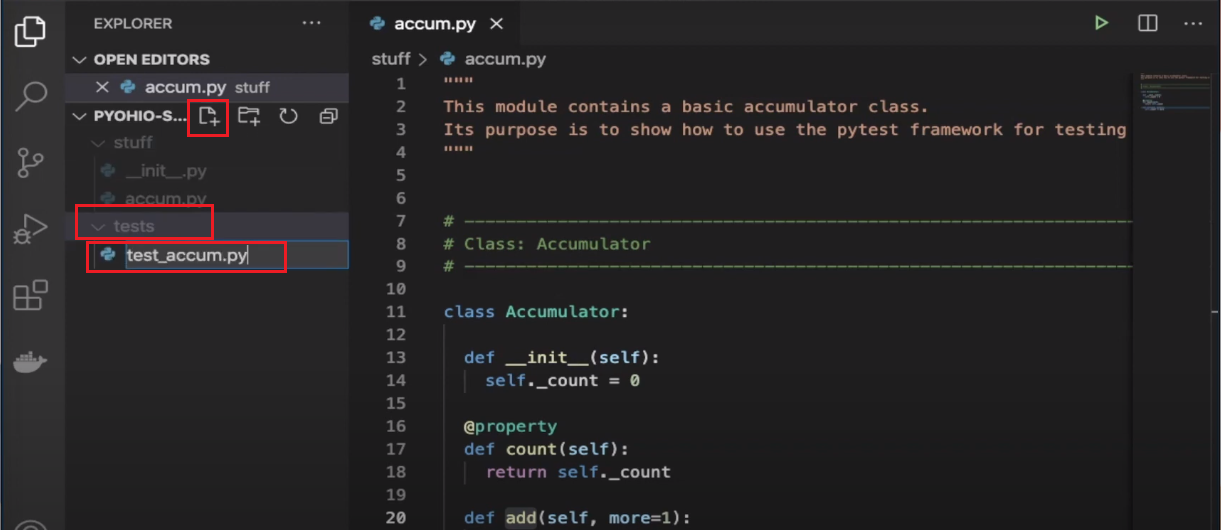
for this demo, Andrew has created a new python project with a package named “stuff” and a module named “accum”

The module has a class named “accumulator”, it has a property named “count” for getting the current count value, as well as a method named “add” for adding to the count
Let’s see how to use that accumulator class briefly.
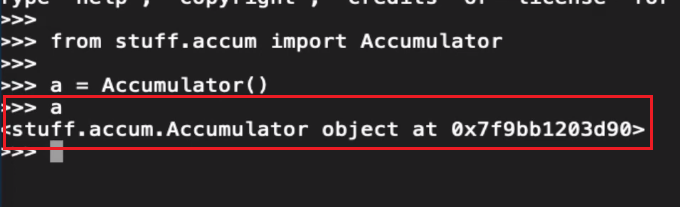
Type in the following –

You can quickly create one, saying:

and now you’ll have the object
Initially, the count is 0.

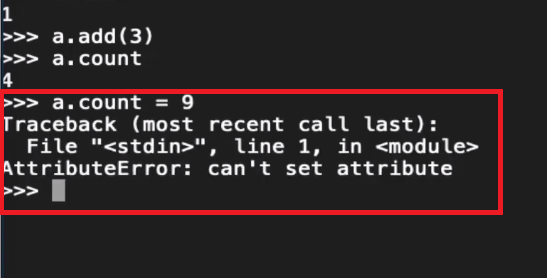
But you can add to it. Adding without any parameters adds 1, but you can also explicitly add 3 also and the account goes up by 3.

One thing which you’re not allowed to do is, set the count directly, as that would cause an error.
Let’s write some unit tests for the accumulator class.
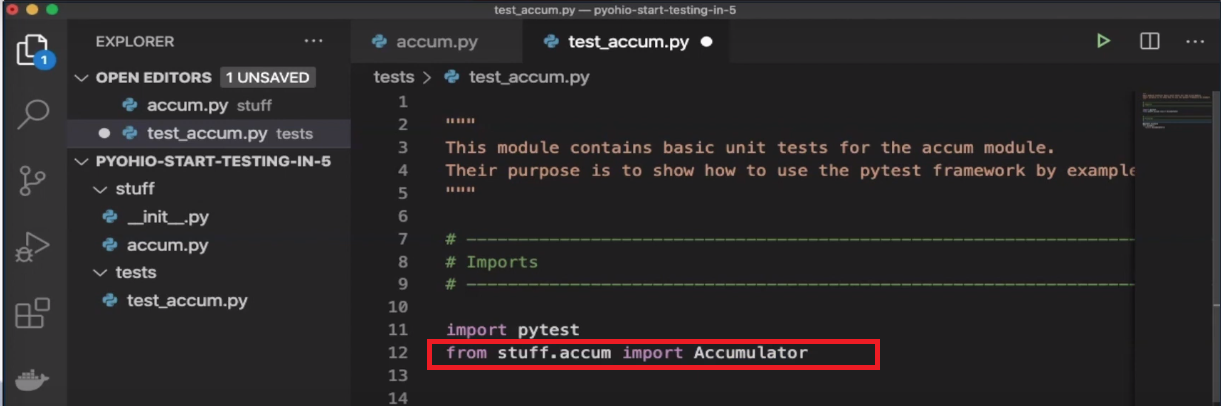
Create a new folder named “tests” in your project, and inside this folder create a new module named “test_accum.py”
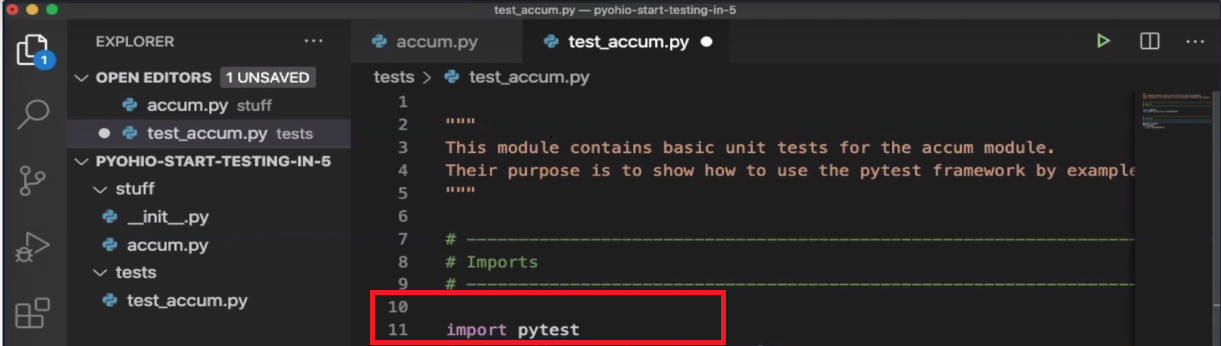
Inside the test module, we need to add some import statements.
1. we need to import “pytest” to get some things from the test framework.
2nd, we need to import the accumulator class from the stuff package.
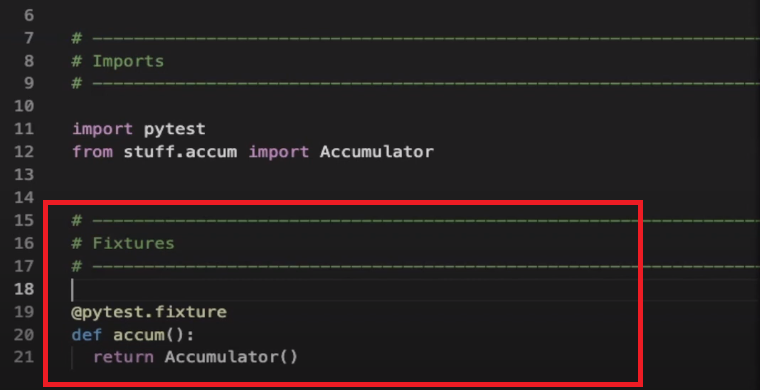
All of our unit tests will need to create accumulator objects. Instead of copying and pasting initializer calls everywhere, we can use a “pytest” fixture to code object creation one time. The fixture is just a function named “accum” and it returns a new accumulator object. It also has a decorator named “@pytest.fixture” to denote it as a fixture.
Our first test case can be short and sweet. It’s just a function named “test_accumulator_ init”.
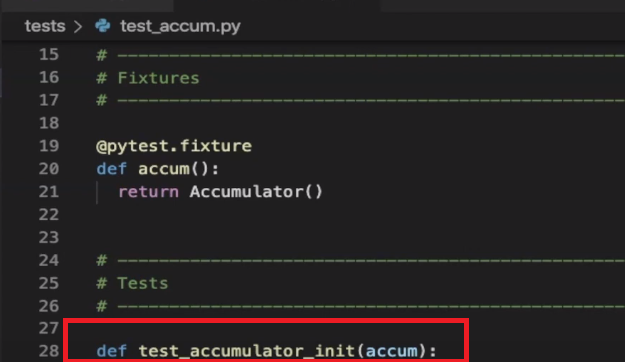
Notice how it takes in an argument named “accum”, which is the same name as the fixture we just created.
When “pytest” executes this function, it will look for a fixture named “accum” and when it finds the right fixture, it will call the fixture and inject its return value into the test function. Here in that way, fixtures act like setup steps.
This test then verifies that the accumulator’s initial count is zero
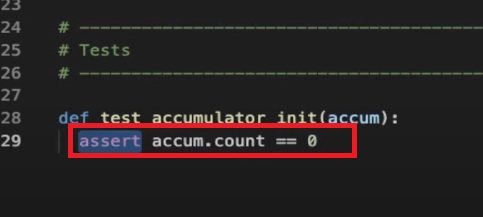
“pytest” uses python’s raw assert command for assertions, there’s no need for special assertion calls. We can add several other unit tests to the same module, each should have a unique name and cover a unique behavior
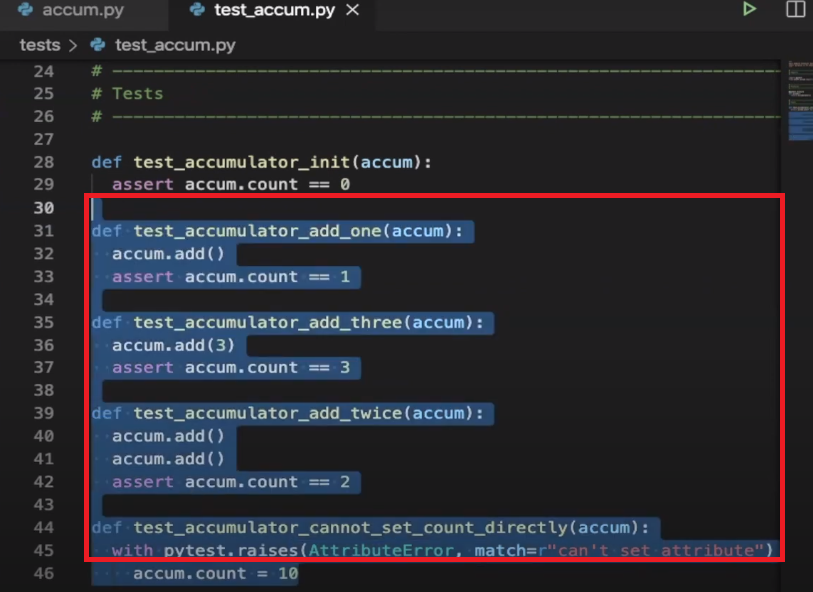
Notice how each calls the “accum” fixture to create their own accumulator objects.
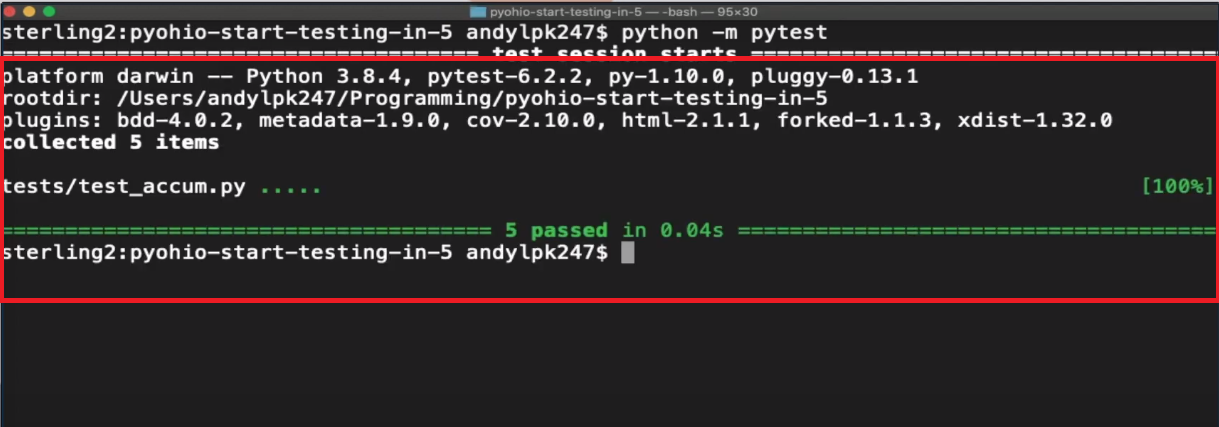
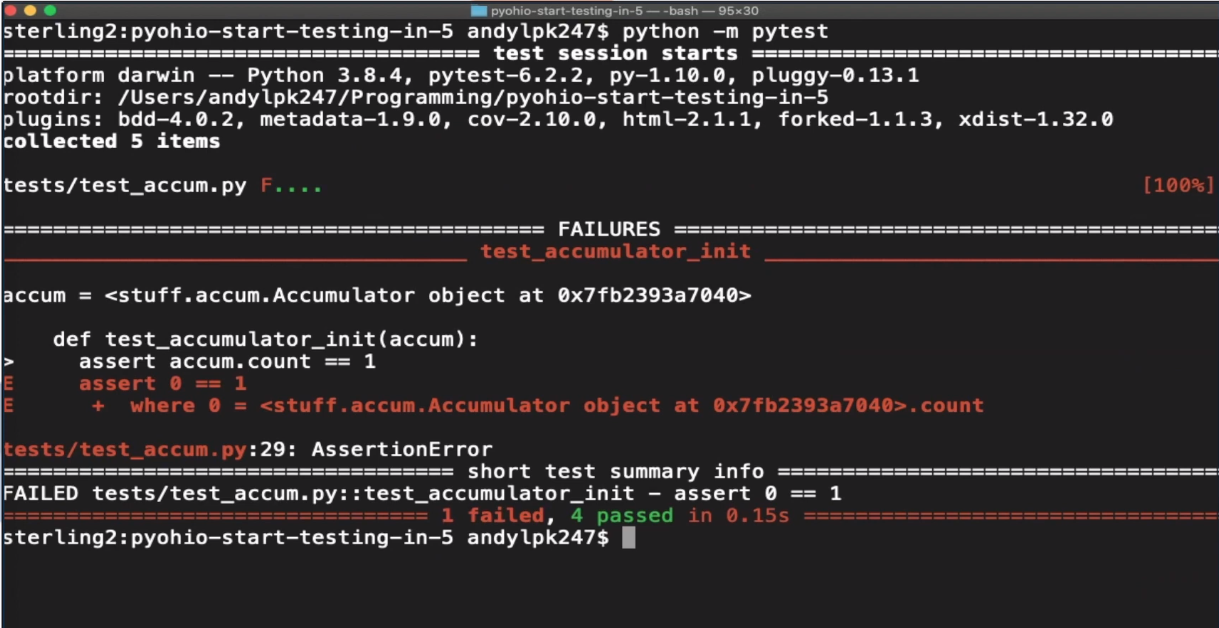
Now it’s time to run these tests. From the command line run “python -m pytest” from the project root directory.

“pytest” will discover test functions and test modules using the test_ prefix. If all tests pass then you should see green dots.
Let’s briefly inject a failure to see what happens when something goes wrong.
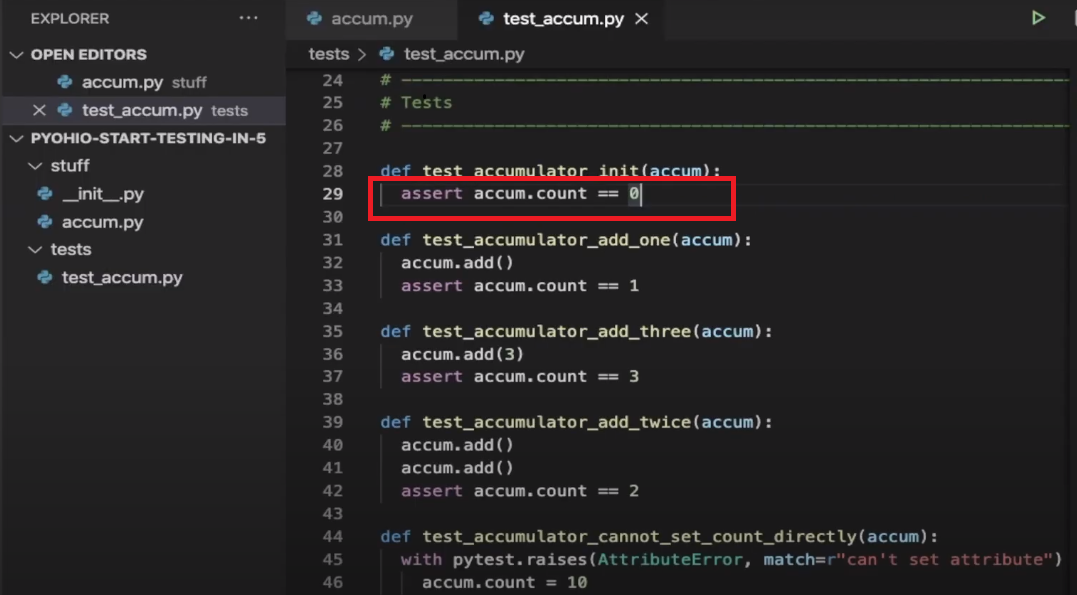
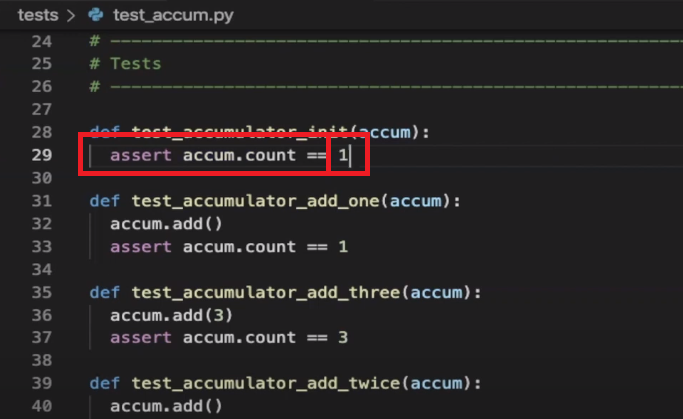
Upon failure “pytest” will give you a big error, and it’ll show you exactly where, and how the failure happened.
Summing Up:
Python is indeed a popular language for test automation because of its simplicity and ease of use. In this post, we have seen how to jumpstart Python testing in just 5 minutes using the pytest framework. By following the steps outlined in this post, you can easily write and execute unit tests for your Python code. The use of fixtures in pytest makes it easy to create and initialize objects for testing, and the use of raw assert commands in pytest simplifies the assertion process. With the help of pytest, you can ensure the quality of your Python code and catch bugs before they cause bigger problems.